A Classy Pink and Gold Halloween Tablescape with rustic charm.
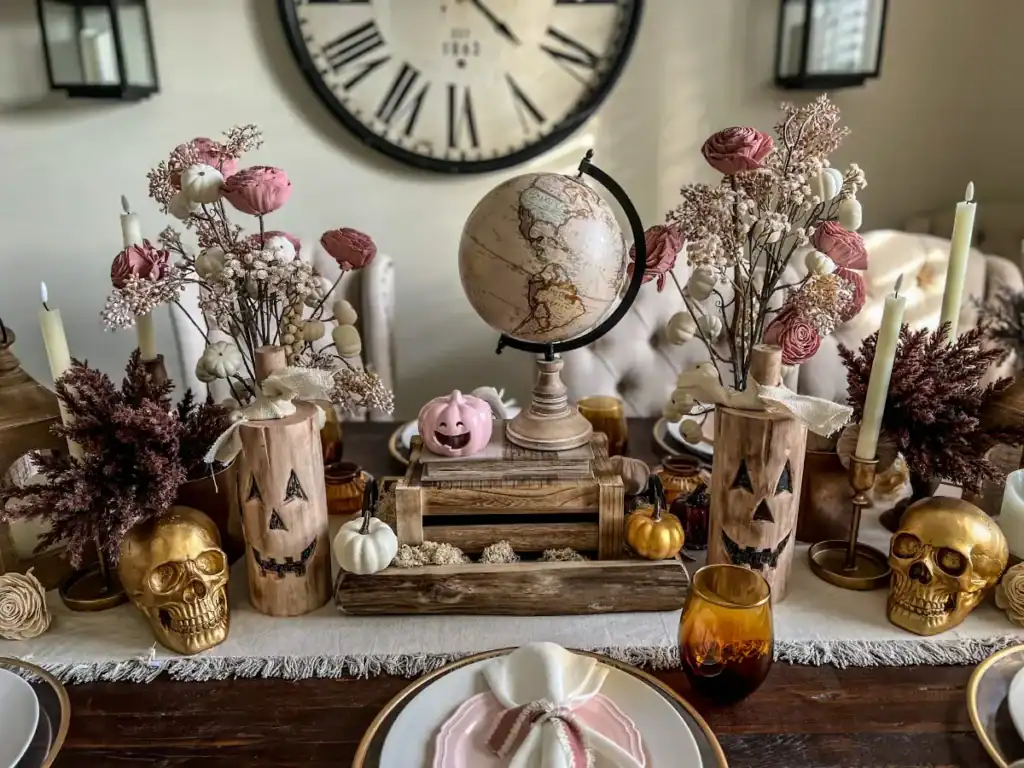
Are you looking for an idea to break away from the typical Halloween decor and freshen up your Halloween tablescape? Have you noticed all the pink halloween decorations in recent years? It’s a nice welcoming twist from the traditional black, orange and purple that has been dominating for decades. How about brightening your style with an updated pink, gold and rustic wood Halloween tablescape theme this year? Check out this pink Halloween theme and let it inspire your own pretty Halloween tablescape ideas!
Find Inspiration
When first starting to brainstorm on what you want to do for your tablescape theme it’s important to have some sort of direction.
My first piece of advice I say to everyone (including myself) is look for an inspiration piece first. This will keep you focused when you are designing and buying items for your table.
Inspiration for me usually comes from one of these things. An inspiring piece, a color, a holiday, a theme or even a movie.
It can be an item I see as I’m roaming the aisles (usually the HomeGoods aisles lol) and I find something that speaks to me when I see it and then I design around a centerpiece or a style or around it. Or I’ve styled plenty of parties and tables around a favorite holiday movie, or even just a theme like a Tea Party theme.
Ask yourself- What is something when you see it you’re like- “yes! I love this!” “Or this would be so fun to decorate a theme around!”
And don’t put pressure on yourself. Sometimes I find one right away, sometimes it’s a few months before the actual holiday and I think “Oh! This could work really well with X holiday!’ So I grab it and save it for later. That’s what I did with this black and white poisoned apple tablescape
Or there have also been multiple times where I know the celebration is coming up and I run around and for weeks and nothing is getting me motivated. I start to get discouraged but something eventually catches my eye and I just go with it!
Inspiration for me usually comes from one of these things: An inspiring piece, a color, a holiday, a theme or even a movie
The Rustic Pink Halloween Theme Inspiration Piece
And there it was. My inspiration piece.
It was August and I was… guess what… roaming Homegoods. (aka my second home).
I was casually browsing when I looked on the top shelf and saw it.
The cutest wooden carved jack o’ lantern pumpkin. It was unique. It was smiling at me. And I was immediately inspired.
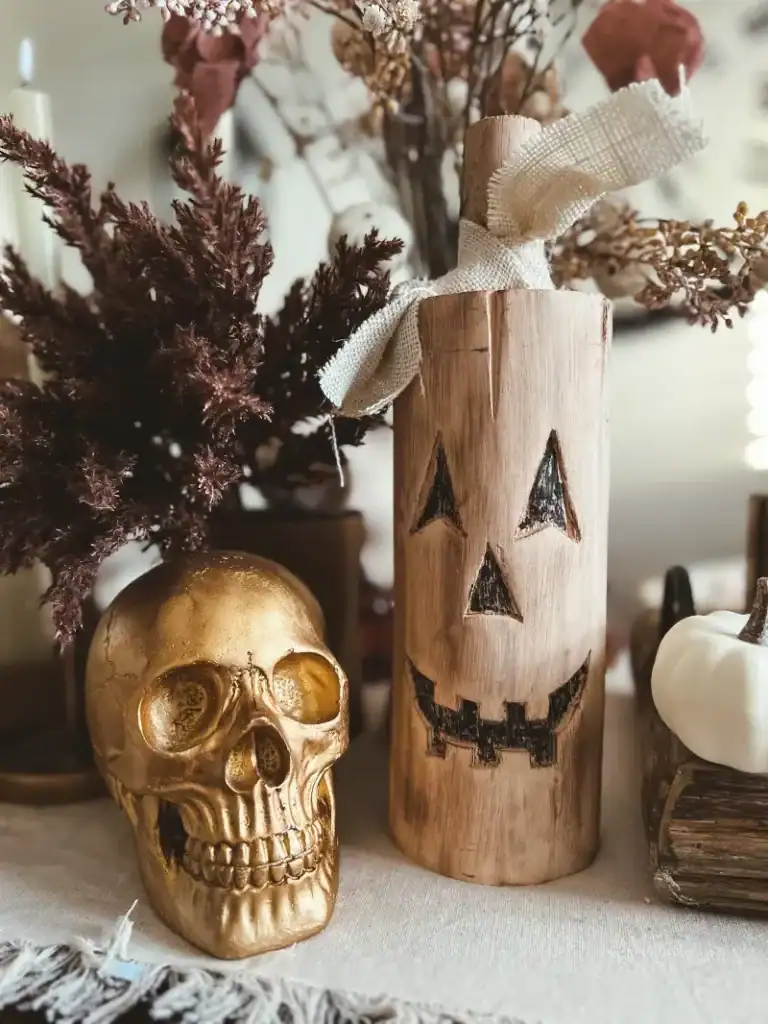
I thought to myself “The stain on it would match perfectly with a blush pink!” And then I looked closer on the shelf and he had matching siblings! Some adorable wooden ghost carved faces too!
But I walked away. The last thing I needed was more Halloween decor.
But I couldn’t get them out of my mind.
And then within a few minutes…I turned back.
I couldn’t resist that face.
They were cute and welcoming. My kind of Halloween decor. From that moment on they had a new home.
Collect your Base Items
Your first step in designing your tablescape is to see what base items you have and see if you need to add any more?
Think about items like plates, tablecloths, runners, napkins, flatware, glass ware, charger plates, placemats.
I like to have neutral items that are “base” decor. For example white plates. You can never go wrong with white and black plates on hand!
I typically like to have my main colors with table runners in white, black, tan and I do the same with placemats.
If I have these neutral base items I can use them in so many different decor styles and they are classic and timeless.
This way I’m not having to go out every season and buy new seasonal items.
Plus, it keeps the look sophisticated, classy and matches with the rest of my home’s style. Oh, and less to put away in storage! WIn, WIn, WIn, and Win!
So look around and gather what you have! I bet it’s way more than you think! And then it’s motivating to see “oh this isn’t as overwhelming as I thought! I have a lot of stuff to use already!”

Use What You Already Have to Start
Also, in addition to your base items you’re gonna need to fill your tablescape with “filler” decor items. Things that complement the theme you are looking to achieve.
The best place to shop for items… again is in your house! Yay! Free!
Free sounds great to me!
The easy thing about a neutral or rustic theme is, more than likely, you have some great decor pieces already on hand.
Just look around at what you already own. What do you have that fits this style?
Remember you can use anything! No rules! This is your own design. I bet you can find some!
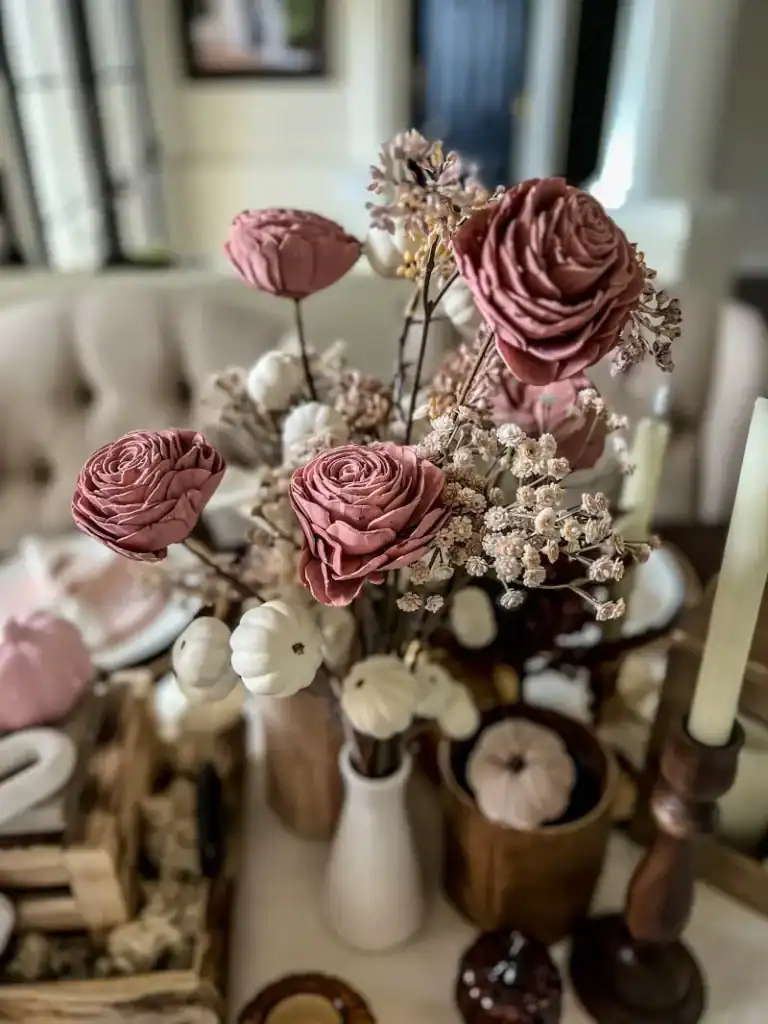
Think vases, candles, greenery, candle holders, tablecloths, trays, stands, placemats, runners, flatware, books, the list is endless!
Walk around your house with a new perspective. See what you can find! It’s like an easter egg hunt!
The best part is:
- It’s free
- It’s already in your own style! Win Win!
So you’re off to a good start! You’re gonna love it because it’s already what you like!
PRO TIP:
The best place to shop is in your house!
When I shopped at my house for this table I looked around and found things that were in the same color family and were versatile enough to blend in to complete the Rustic Halloween theme.
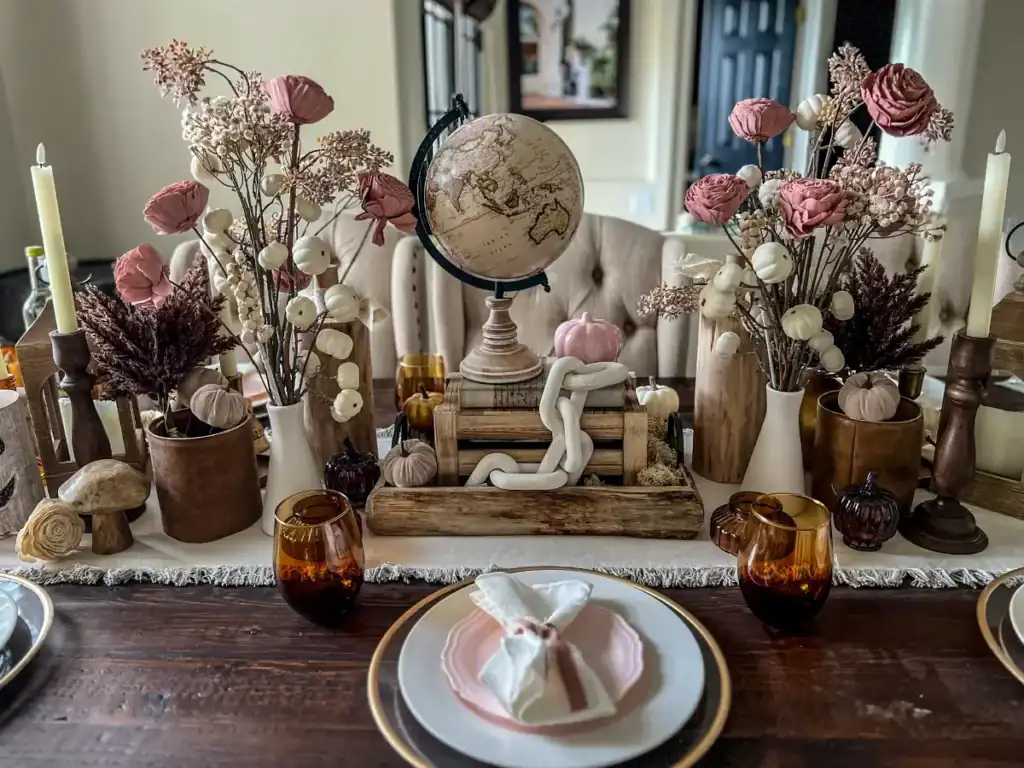
A globe, wooden tray, crate, book, lanterns, candle holders, table runner, votives, leather vase, greenery/paper flowers. All things I already had.
Collecting the Pink, Gold and Wood Halloween Table Decor Accents
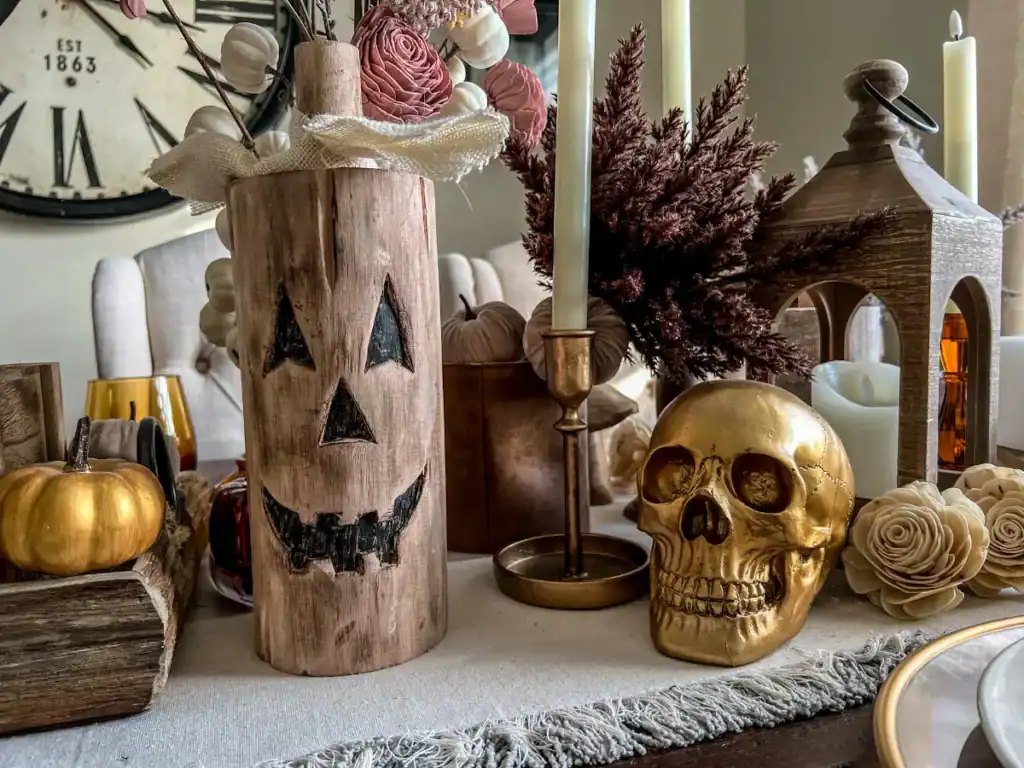
Now gather together all the Halloween accents you want to use!
Remember you don’t need to go over the top. Just a sprinkle of Halloween decor will be enough to show that the table is Halloween themed, but in a classy, not over the top way.
And because you have all the other items from what you already have, the table will have plenty of decor to look at and talk about.
For this table I wanted pink and gold with a rustic, woodsy feel.
So I had the wooded carved jack o’ lantern pumpkins and ghosts, two gold skeletons, pumpkin greenery stems, a few small faux, glass and raffia pumpkins and three ceramic pink jack o’ lanterns. And that was enough!
Let’s Get This Vision Started!
Now that you have all your base, Halloween and core decor collected it’s time to get to the fun parts! Putting it all together!
But first…clean up. Start with a clean slate. And I literally mean clean.
Clean off your table of everything, wipe the table down and then make sure any linens you use are clean and ironed.
Nothing like having a beautiful tablescape and having creases in your table runner or tablecloth.
Have you ever seen creative tablescape pictures and one of the first things you notice is the lines and wrinkles in the fabric?
It immediately detracts from the decor.
Yikes! Not the first impression you are going for.
Bust out that iron (or cheat and throw it in the dryer. Sometimes that works and sometimes it doesn’t). Or, if you have a steamer, it’s a great time to use it! You will be so happy you took the time to do it!
After you have your table runner all crisp and perfect, it’s time to get started!!
Pro Tip:
Make sure any linens you use are clean and ironed.
Lay Down the Foundation
First, put down the table runner. It gives a nice separation between the table and what is going on top of it.
I like to use neutral colors so it doesn’t compete with the halloween decor and it’s a nice contrast from my dark table.
You could also use a tablecloth, but I seem to always gravitate towards a table runner.
I look at a table runner table as kind of like a runway for displaying all the decor and keeping it “contained” or displayed in one area. It visually keeps it from spreading out too much and separate from the place settings.
I used a tan/khaki oversized table runner this time. It was a great match with all the wood.
The Centerpiece
The next step is creating your centerpiece.
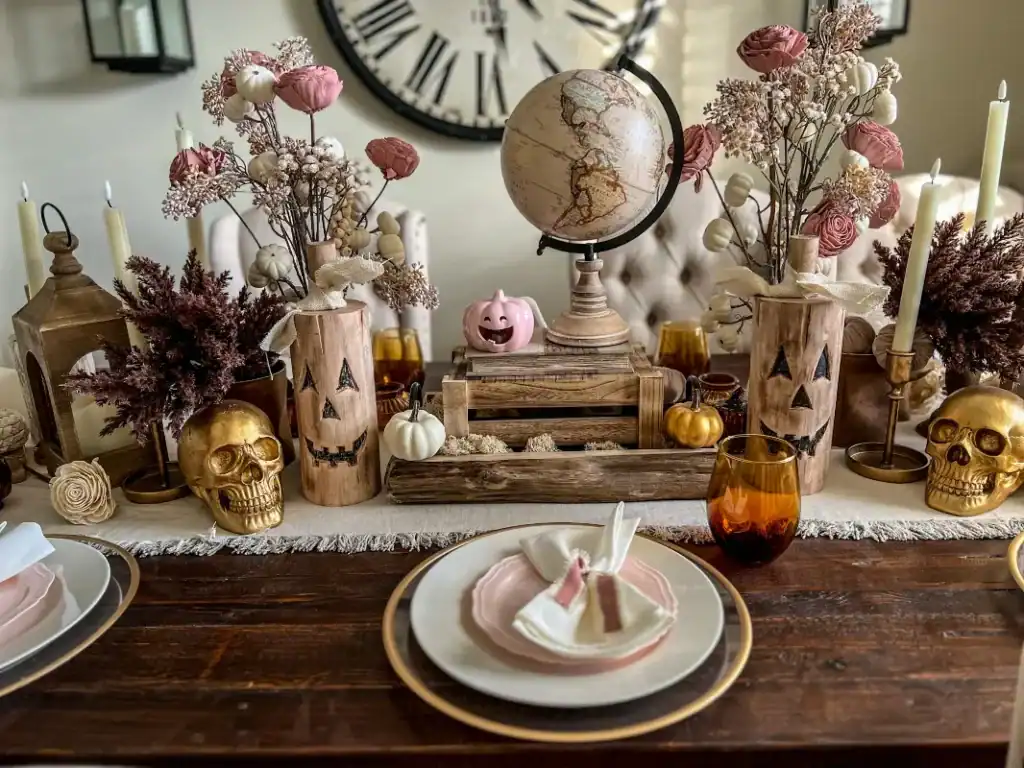
For building this centerpiece you will need a wooden tray, moss, a book, a globe, and pumpkins.
Start by putting the wood tray on top of the tablerunner. The next step is to put the crate upside down in the tray. Fill around the crate with moss. I used reindeer moss here.
Then take a book with a neutral cover and put the bind in the back so the pages part is facing the front. This book I’m using is actually a fake book from Hobby Lobby, but if you have a book handy you could use that.
And if you don’t like the cover just go old school and put a paper bag book cover on it like we used to do back in school! It’s neutral and rustic so it totally works! Or if you have a book with a pink cover you could use that too!
I wasn’t sure what to put on the top of the crate as I looked around at the items I collected. Hmmm… what could I use? Then my globe stuck out.
It’s not really “Halloweeny” but the colors were perfect so why not? Not everything has to be related to Halloween. My table, my rules! Plus, the height was perfect!
Next up were the pumpkins.
My mother-in-law knew I was going pink this year and bought me these fun and happy pink jack o’ lanterns. She knows I like “happy” halloween and not “scary” halloween.

I loved them! I had to find a way to work them in. They were so cute next to the rustic wood pumpkin. I love that the textures were different, yet went together.
You will see two other pumpkins, but I added them later with the filler items.
Besides the pink pumpkin, these were all items I already had and were neutral. You may recognize them in some of my other tablescapes.
Making the Pink Halloween Theme Come to Life
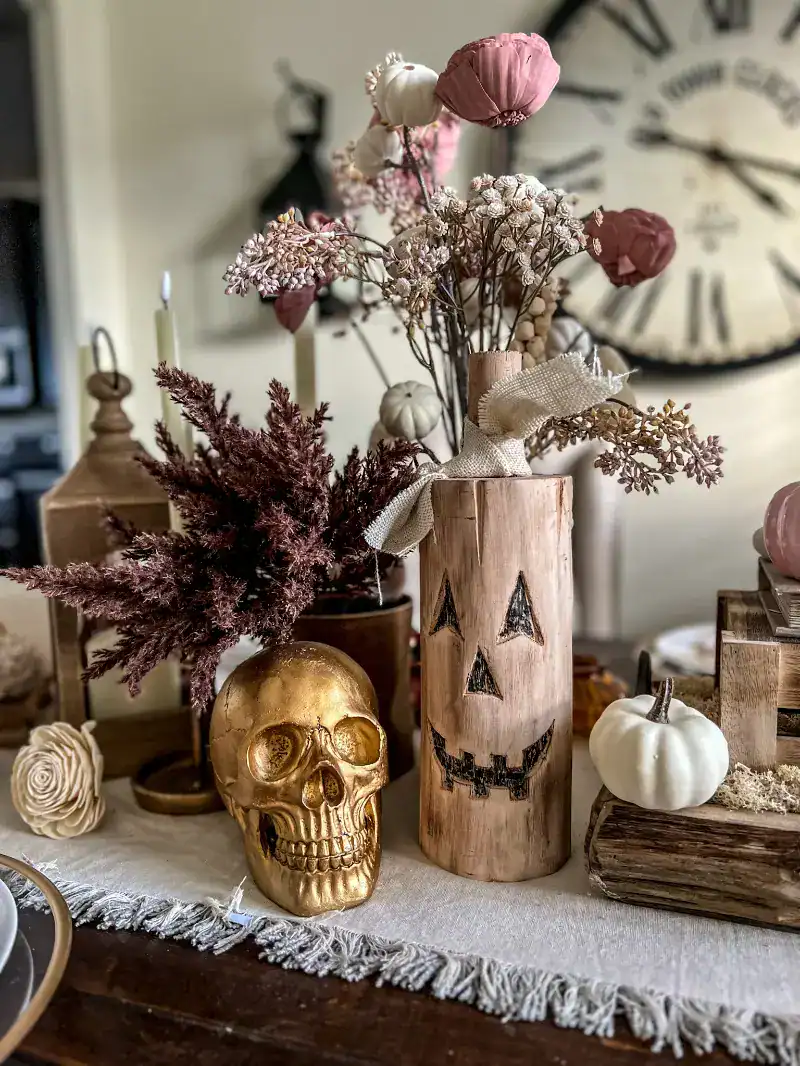
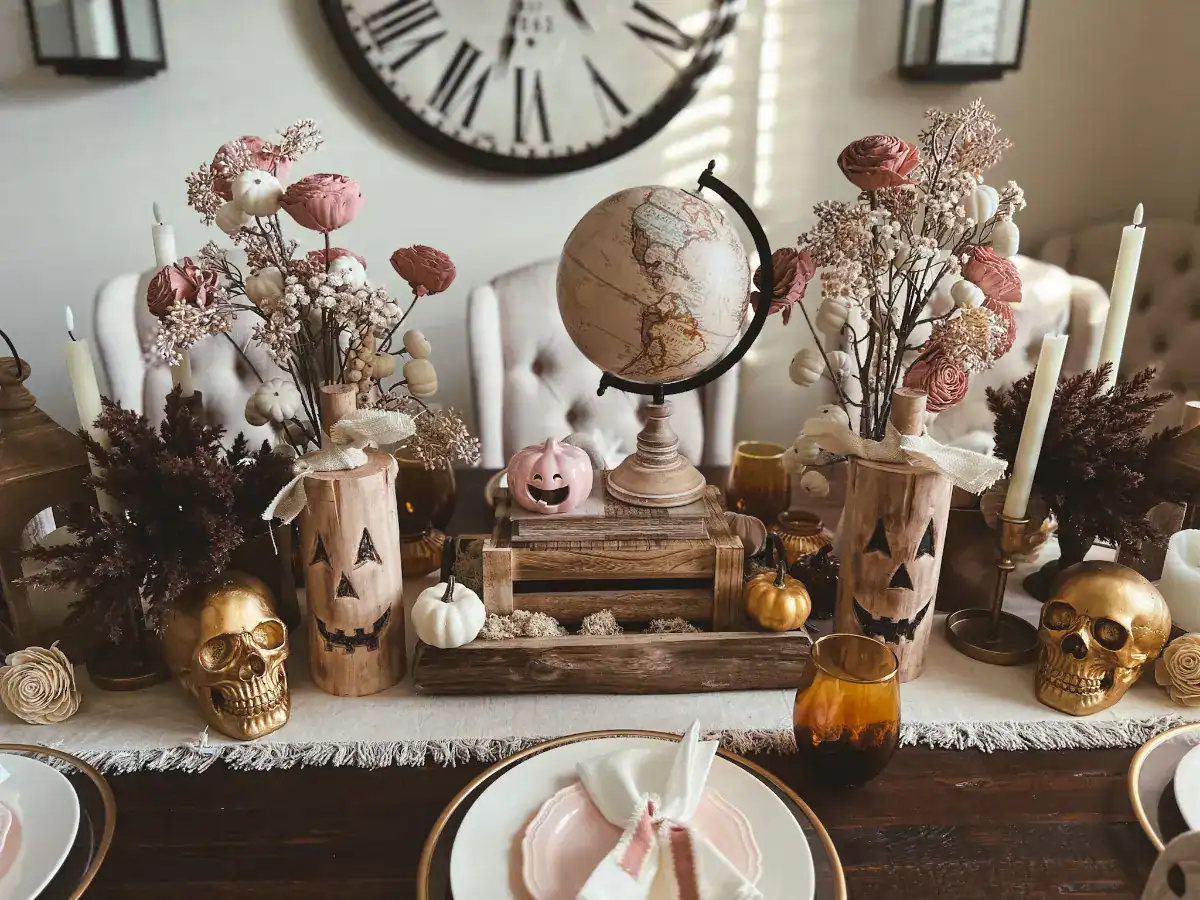
Then on the sides of the centerpiece I was excited to put down the inspiration pieces! The fun wooden pumpkin faces. They looked great with the other wooden accents.
I also wanted to pull in the gold from the skulls and add some other gold pieces.
I decided to paint some faux mini pumpkins to tie the gold in. So I took some white pumpkins and I actually had to mix two gold acrylic paints from Hobby Lobby together to get the right skull gold color. It wasn’t exact, but it was pretty close.
Then I added a white pumpkin and a gold painted one to the centerpiece.
I took a step back and looked at where I was so far and I felt I needed to soften the hard lines of the wood a bit. All the woods felt heavy.
Next I took some pink and cream faux flowers and filled in two white vases with them. I then placed them behind the carved wooden pumpkin faces.
I also had some shorter faux leather vase-like containers and put some fake brown greenery stems in them. They soothed the hardness of the wood and also added different heights which were needed.
As a last touch for height, and to balance the wood out, I put two wooden lanterns on either side of the table. I love these lanterns. They match so well with all the other wood decor I have. They are the perfect height and I use them all the time!!
Bring on a Touch of Gold Halloween Decor
After all the pink was put in I then was able to see where to add the few gold accent pieces I wanted.
I used the gold skulls on either side of the wooden pumpkin faces to stagger the height of the decor on the table.
Then of course you need to have candles… It’s Halloween! Halloween just seems to invite candlesticks so the gold candle holders I already had did the trick.
On the backside of the tablescape I put the wooden rustic ghost faces that complimented the carved wooden pumpkin jack o’ lanterns, added a wooden chain to the crate, and some wood mushrooms.
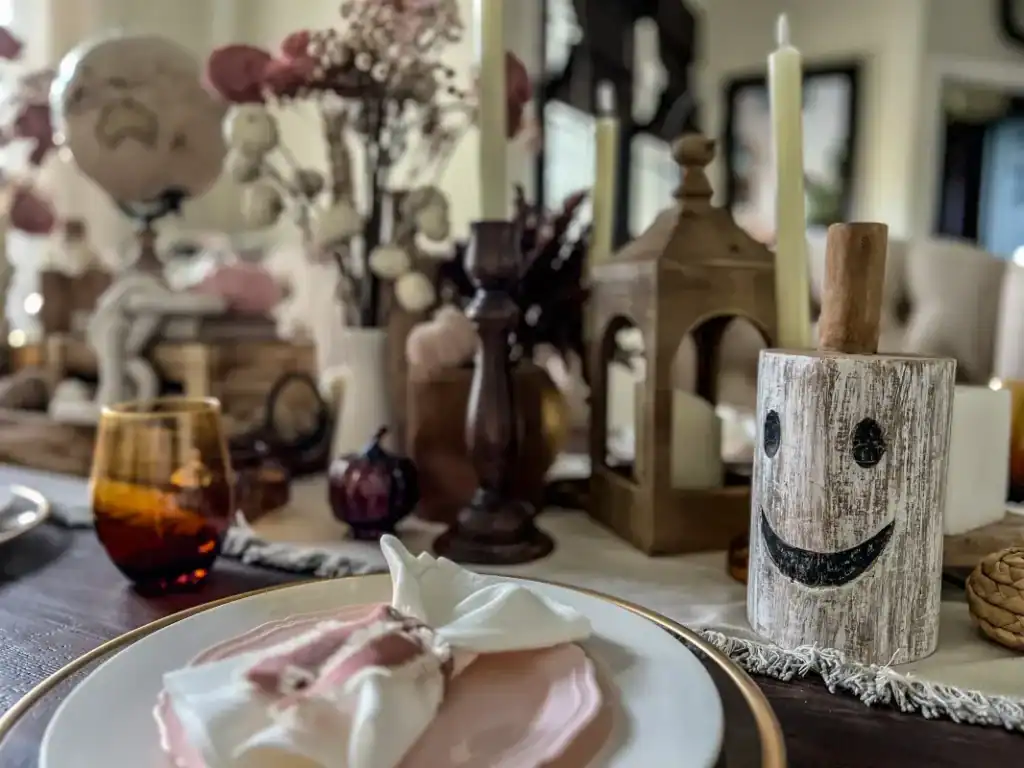
To add texture I then placed some amber colored glass pumpkins and amber votive holders. It helps add visual interest mixing in different textures in your decor.
And lastly I added two wooden candlesticks and white paper flowers and placed them throughout the table where I felt it needed “something”.
Pink Halloween Place Settings
I didn’t use placemats this time because my tablerunner was oversized and my placemats would have overlapped on the tablerunner.
At first I thought it may look odd, but since there was so much wood going on having the dark wood exposed from the table just added to the ambiance!
Time to build the simple place setting…
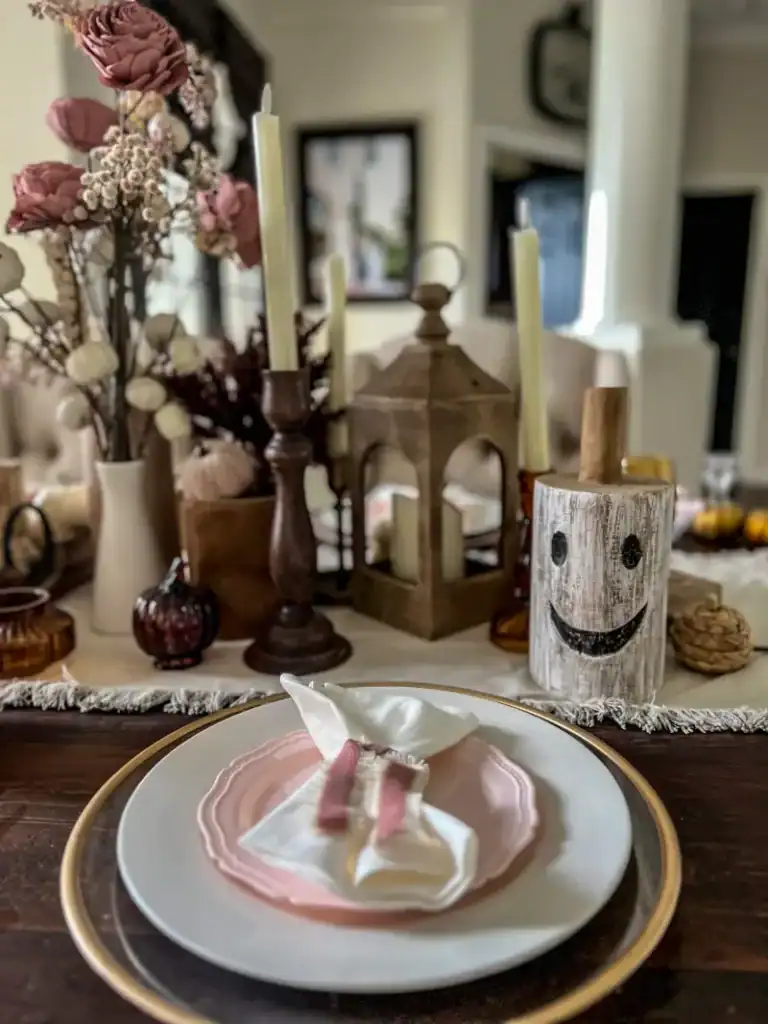
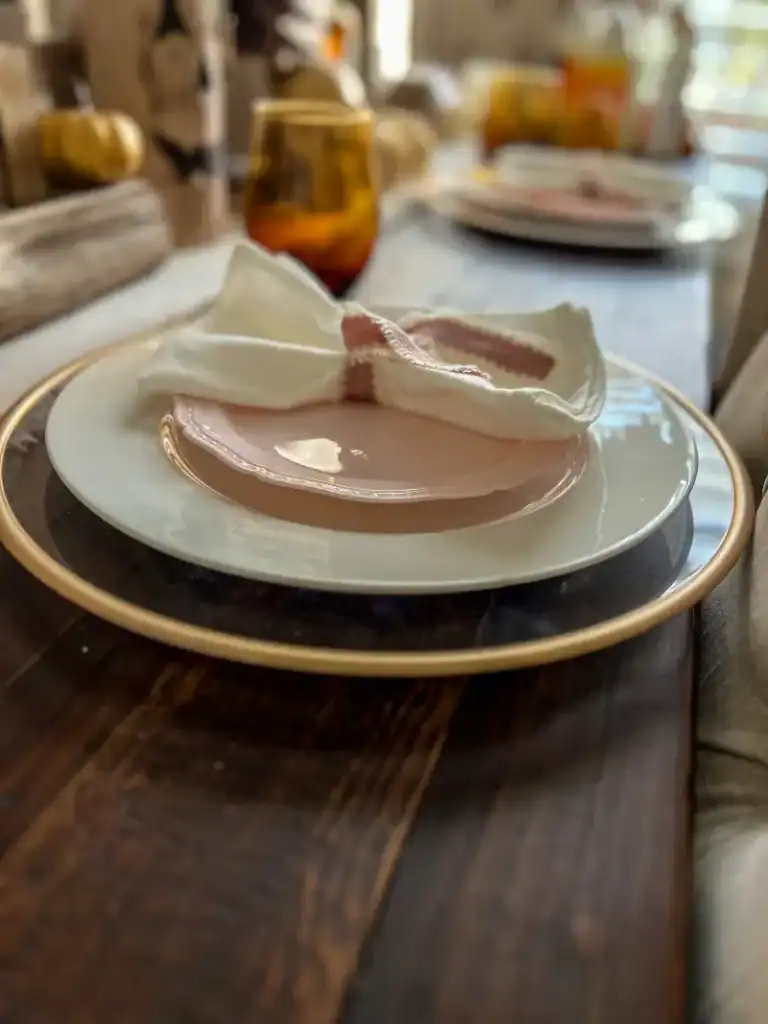
I started with clear chargers that had gold trim. I got these from Hobby Lobby a while back. Then I added just a plain white plate that I always have since I’m a big believer in neutral dishes because they match with everything.
I then added these pink appetizer plates from Homegoods, but they were too flat and they didn’t have an elevated edge to them so they kind of “sunk in” to the plate and looked weird.
So to fix the visual part of that I added a piece of foam underneath to bring them up a little bit. Honestly, next time I would use something different that’s a little more pretty or personalized because when you take off the plate you see this ugly foam piece (yikes).
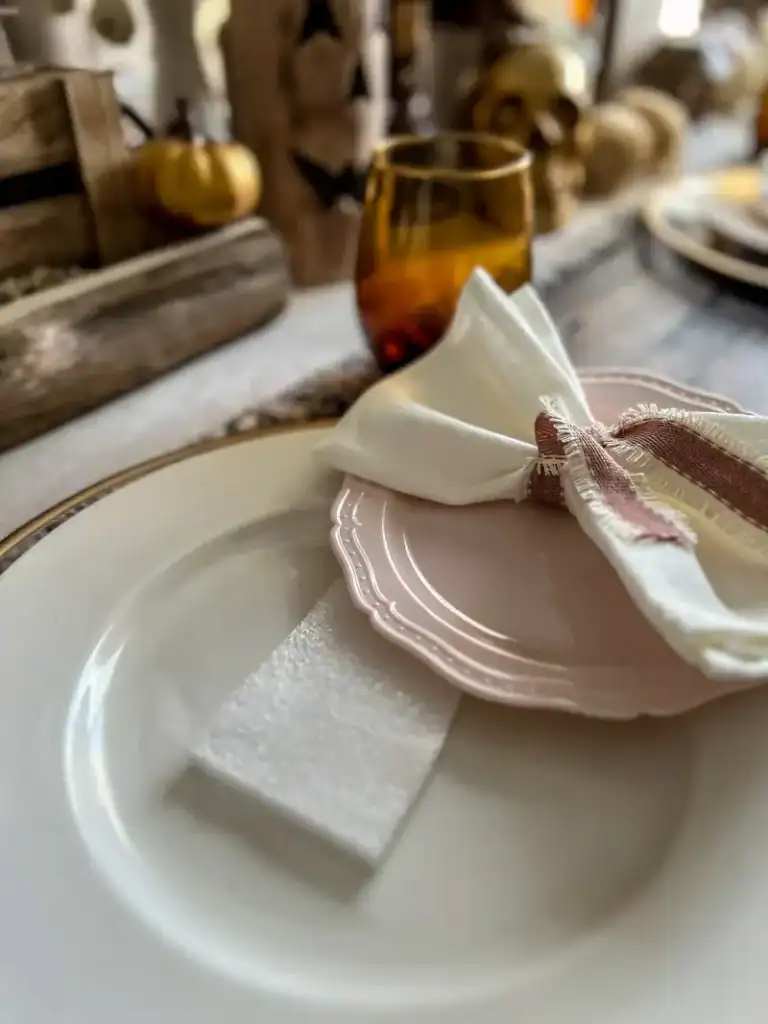
As another option for next time, maybe a folded note could work double duty. It would be a nice surprise and elevate the plate just slightly enough to make a difference.
And finally a white linen napkin with a pink ribbon tied around it.
Then I added the amber glasses to tie in the other glass amber pumpkins and votives. It’s a great feeling when you are decorating and suddenly it’s all flowing together!
And lastly, I would add gold flatware. I forgot this part and added it after I took the pictures. Oops! Hopefully you can visualize it anyway!
To add the finishing touch I put the battery operated candles and tapers in the candleholders and candlesticks. That was it!
In Conclusion
I stepped back and checked out the pink and gold rustic halloween tablescape and smiled. It wasn’t spooky or scary. It was warm, cute and inviting. I loved it!
So what do you think? Are you going to try something different and go for a pink Halloween theme this year? I hope this helps inspire you to create your own memorable Chic Rustic Wood and Pink Halloween Tablescape Idea! Use this Halloween table decor idea to elevate your celebration, and don’t forget to share or pin this inspiration so friends and family can enjoy the magic of a fun Halloween tablescape too! I hope it inspired you to try your own pretty Halloween decor! Happy Halloween!


